How to Fix a Torch Lighter: A Comprehensive Guide to Troubleshooting and Repairing Your Torch Lighter
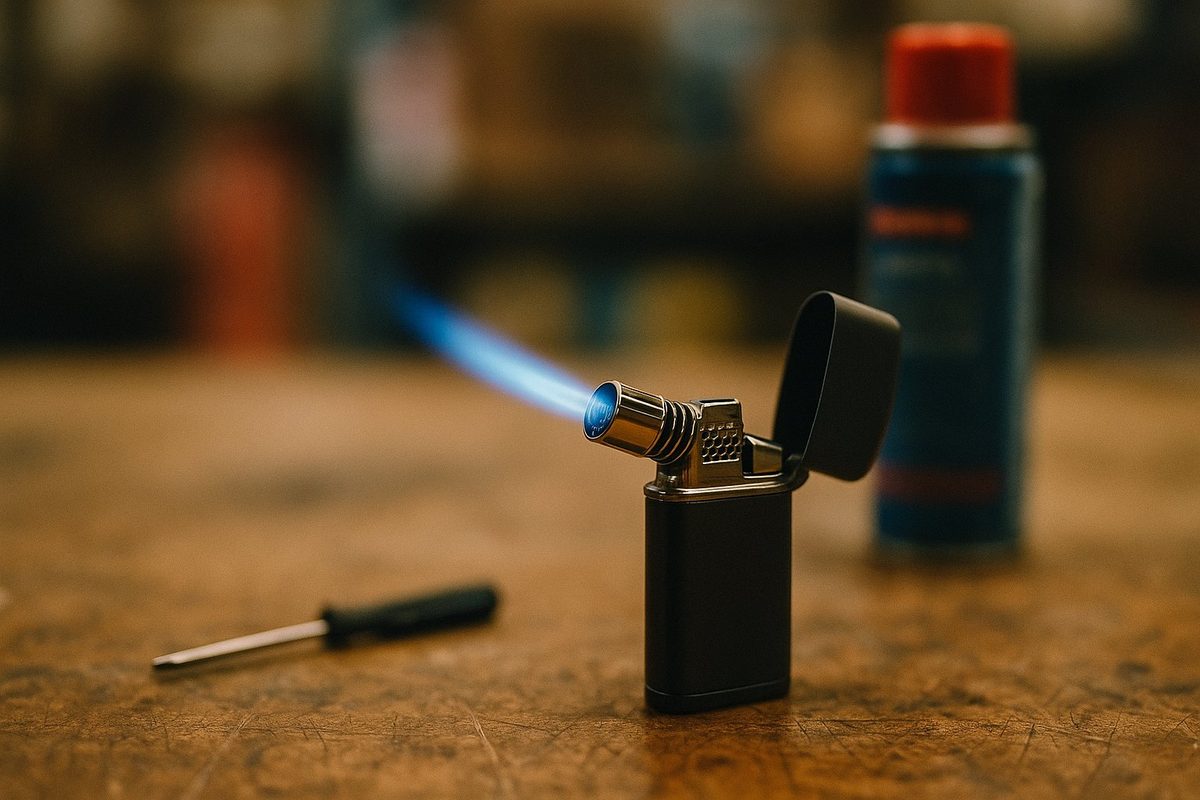
Torch lighters are an essential tool for many, from chefs seeking precision in their culinary tasks to outdoor enthusiasts needing reliable flame sources.
However, like any mechanical device, they can occasionally malfunction. Understanding how to troubleshoot and fix common issues with a torch lighter can save you time and money.
This guide will explore how to fix a torch lighter, provide helpful tips and practical solutions to ensure your torch lighter is reliable and ready to use.
Effective Solutions for Fixing Torch Lighters
Torch lighters are excellent tools, especially for cigar aficionados and outdoor enthusiasts. However, like any device, they can sometimes malfunction. Here’s a guide to getting your torch lighter back in working order, whether it’s a quick adjustment or a bit of cleaning.
1. Refill the Fuel Properly
- Use High-Quality Butane: Always refill your lighter with high-quality butane fuel to avoid impurities that can clog the lighter.
- Purge Before Refilling: Press the refill valve with a small tool (like a paper clip) to release any remaining gas and air pockets. This step helps prevent inconsistent flames.
- Allow Time for Settling: After refilling, let the lighter rest for a few minutes to stabilize the gas inside and prevent any potential misfires.
- Pro Tip: Avoid shaking the butane canister before refilling, as this can introduce air bubbles, disrupting the fuel flow.
2. Adjust the Flame Setting
- Locate the Adjustment Wheel: Most torch lighters have an adjustment wheel or screw at the bottom. Use a small flathead screwdriver or your fingers (if accessible) to turn it.
- Increase the Flame Height Gradually: Turn the wheel slightly higher if the flame is too low or inconsistent. However, avoid turning it to the maximum setting, which can make the flame too large and unstable.
- Pro Tip: Always make small adjustments to avoid over-fueling, which can cause sputtering flames or difficulty in igniting.
3. Clean the Jets and Ignition Area
- Use Compressed Air: Blow out dust, debris, or carbon buildup from the lighter’s jets and ignition area with a can of compressed air. This helps ensure a clean flame and smoother ignition.
- Check for Residue: Wipe the nozzle with a cotton swab to remove any visible residue that may be blocking the fuel path.
- Inspect the Flame Nozzle: If the flame is sputtering or uneven, a clogged nozzle may be the cause. Gently use a fine wire to dislodge any debris in the nozzle.
- Pro Tip: Regular cleaning helps prevent blockages and ensures a consistent flame, especially if you use your lighter frequently.
4. Check the Ignition Spark
- Observe the Spark: Hold the lighter up to eye level and press the ignition to check for a visible spark.
- Replace the Ignition Piezo: If there’s no spark, the piezo igniter (the small metal piece that creates the spark) may be worn out and require replacement. You can find compatible replacement parts online or at specialty stores.
- Align the Electrode: Sometimes, the electrode may be misaligned. Gently reposition it to ensure it makes contact with the gas flow.
- Pro Tip: Test the spark in a dark room to easily spot any issues with ignition.
5. Avoid Overheating and Rest Between Uses
- Use the Lighter for Short Intervals: Continuous use can overheat the lighter, causing fuel flow issues. Allow it to cool down between uses.
- Prevent Pressure Build-Up: Avoid pressing the ignition repeatedly without giving the lighter time to rest, as this can damage the internal components and reduce its lifespan.
- Pro Tip: If the lighter feels warm to the touch, give it a few minutes to cool down before reigniting.
With these methods, you can keep your torch lighter in optimal condition and extend its lifespan. Whether it’s a quick refill, cleaning, or adjusting the flame, regular maintenance ensures that your lighter works perfectly every time you need it.
Common Issues with Torch Lighters
1. Refilling Problems
- No Fuel: Check if the lighter is empty. A simple refill often solves the issue.
- Improper Refilling: Ensure you're refilling the lighter correctly. Let it sit for a few minutes after filling to prevent internal pressure issues.
2. Clogged Nozzle
- Debris Buildup: Inspect the nozzle for dirt or debris that can impede the gas flow. A simple cleaning can resolve this issue.
- Blocked Jet: Use a pin or needle to clean out any blockages in the jet that can lead to uneven flame.
3. Ignition Failure
- Flint Issues: If your lighter has a flint, check if it’s worn out or needs replacement. A worn flint can prevent the ignition.
- Piezoelectric Ignition: If the lighter has a piezoelectric ignition, ensure there's no damage to the ignition mechanism. Tap it gently if necessary to reset any potential blockage.
4. Flame Issues
- Weak or Uneven Flame: This can often stem from an improperly filled tank or a clogged nozzle. Cleaning or refilling usually resolves this.
- Flame Too High/Low: Adjust the flame settings typically located at the bottom of the lighter. Remember to make these adjustments in small increments.
Troubleshooting Less Common Torch Lighter Problems
While many issues with torch lighters are straightforward, some problems are less common but can still hinder performance. Here’s how to address these rarer issues to keep your torch lighter functioning perfectly.
1. Gas Leak Detection
- Listen for Hissing: If you hear a faint hissing sound, it may indicate a gas leak. Check the refill valve and the nozzle to see if there is any residual gas escaping.
- Apply Soap Solution: To confirm a leak, apply a small amount of soapy water around the valve and nozzle. If bubbles appear, there’s a leak that may require professional repair or replacement of the lighter.
- Pro Tip: Avoid using a leaking lighter, as it poses a fire hazard. Instead, consult a professional or replace it if the leak persists.
2. Frozen Valve
- Warm It Up: Cold weather or overuse can cause the valve to temporarily freeze, affecting gas flow. Let the lighter sit at room temperature for a few minutes before trying again.
- Avoid Overuse: Rapid, repeated ignitions can overheat the lighter, which can then lead to a frozen or jammed valve once it cools quickly. Use in short intervals to prevent this.
- Pro Tip: Keep the lighter in a warm pocket or environment if you’re using it outdoors in cold conditions to avoid freezing issues.
3. Faulty Adjustment Wheel
- Check for Debris: Dirt and debris can jam the adjustment wheel, causing difficulty in changing the flame setting. Clean around the wheel with a small brush to ensure smooth operation.
- Inspect for Looseness: If the adjustment wheel feels loose or spins too freely, it may have become stripped or damaged. In this case, replacement might be necessary.
- Pro Tip: Use a small screwdriver to tighten or adjust the wheel if it seems loose, ensuring that the flame setting stays consistent.
4. Weak or No Spark Due to Humidity
- Dry Out the Lighter: High humidity can sometimes interfere with the spark generation. Let the lighter sit in a dry place or gently blow-dry it on a cool setting to eliminate any moisture.
- Store in a Dry Environment: When not in use, store your lighter in a dry place to reduce the chance of moisture affecting its performance.
- Pro Tip: Use silica gel packets around your storage area to absorb excess humidity and keep your lighter dry.
5. Button or Trigger Malfunctions
- Test the Button Mechanism: Over time, the button or trigger can become stiff or fail to press down completely. Gently clean around the button area with compressed air to remove any dust or grime buildup.
- Lubricate with Caution: In some cases, a tiny drop of lubricant can help, but avoid using excessive amounts, as they can interfere with the lighter’s mechanism.
- Pro Tip: If the button still feels jammed after cleaning, consult a repair specialist to avoid further damage.
Addressing these less common issues can make a significant difference in the performance and longevity of your torch lighter. By handling even rare problems with care, you can ensure your lighter remains dependable and ready whenever you need it.
Master the Art of Torch Lighter Troubleshooting
A well-maintained torch lighter is essential for enjoying a flawless flame whenever you need it. From refilling properly to cleaning and troubleshooting, understanding how to fix common issues helps you keep your lighter working smoothly and efficiently. With these practical tips and maintenance routines, you’ll ensure that your torch lighter is always reliable, whether for outdoor adventures or cigar lighting.
Ready to take your cigar experience to the next level? Pair your torch lighter with a premium cigar from our curated selection for the ultimate enjoyment. Visit Online Cigars today!
Key Takeaways:
- Routine Maintenance: Regularly clean and inspect your torch lighter to extend its lifespan.
- Use Quality Fuel: Invest in high-quality butane to minimize clogging and malfunctioning.
- Know Your Lighter: Familiarize yourself with the specific components of your model, as different types may require unique maintenance steps.
Fix It By Brand: Eagle, Scorch, Blink, Maven and Xikar
Most torch lighters fail in the same few ways, and the steps above solve them whatever the name on the body. A few brands do have quirks worth knowing before you take anything apart. Start with the two checks below, then jump to your brand.
- Check the fuel first: Most clogged jets are caused by the butane, not the lighter. Cheap fuel leaves residue in the jet and corrodes the internals. Use butane refined at least five times — it is the cheapest repair you can make.
- Listen for a continuous hiss: A short hiss while refilling is normal. A hiss that carries on afterwards means butane is escaping from a worn valve or gasket, and escaping butane can ignite. Stop using that lighter — this is the one fault here not worth repairing yourself.
1. Eagle Torch Lighters
The most asked-about brand, and almost always a refill or reassembly question rather than a fault unique to Eagle.
- Run the standard sequence: Bleed the tank completely, let it reach room temperature, refill in one slow press, then wait two minutes before striking it.
- There is no official repair manual: Eagle does not publish a service manual or an exploded parts diagram. The PDFs circulating under that name are generic third-party guides for butane lighters in general. Everything such a manual would tell you is on this page.
- Eagle Torch Safe Stop: A separate product line, not a different repair. Owners report it lighting then cutting straight back out with the flame refusing to climb — a partially airlocked tank does exactly that, so bleed and refill first. The mechanism is not publicly documented, so treat online descriptions of its internals with caution.
- Pen-style models run dry sooner: They hold less butane, cool faster in use, and a cold tank loses pressure. Lights, burns briefly, dies is usually fuel and temperature, not a fault. Warm it in your hand and judge it on a full warm tank.
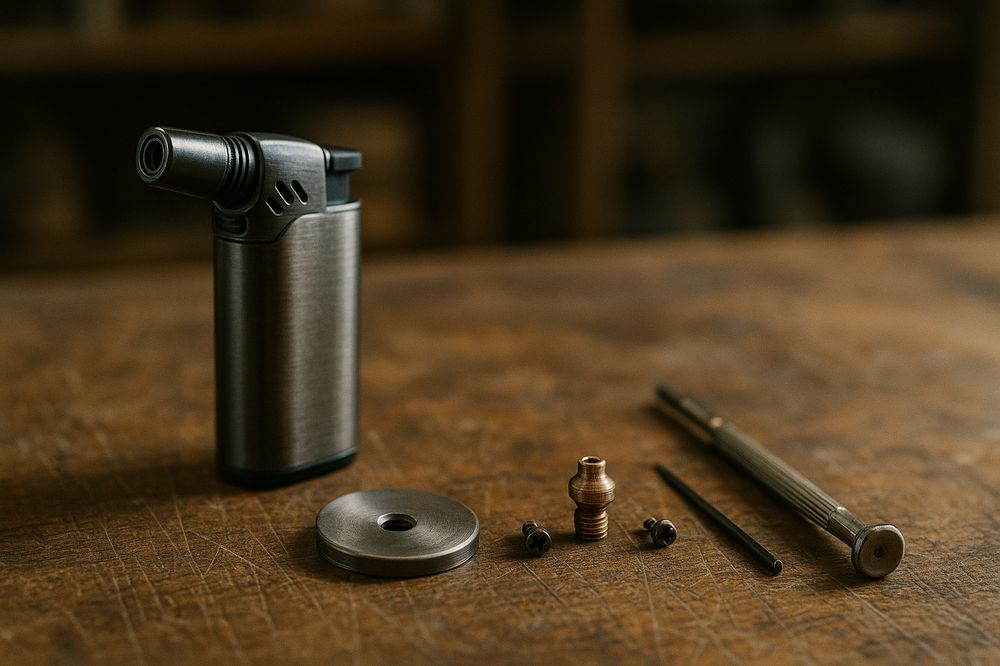
- Reassembly order: Jet nozzle seated first, then the base plate, then the screws — finger tight. Budget torch threads are soft, and a stripped thread is not repairable.
2. Scorch Torch Lighters
- Clean every jet, not just one: Scorch models are commonly multi-jet, and multi-jet heads are more sensitive to partial blockage. One clogged jet makes the flame lopsided or stops it holding rather than killing it outright.
- Check the air intake too: Clear the intake slots around the burner head at the same time as the jets.
- Work out if yours takes a flint: Some Scorch models use a flint rather than a push-button piezo igniter, and the two fail in completely different ways. If the ignition spins or scrapes with no resistance, that is a spent flint — and it is replaceable. A push-button model has no flint to change.
3. Blink Torch Lighters
- Almost always the post-refill airlock: The most common complaint is that it stops working after a refill. That is the airlock described above, not a defect. Bleed fully, warm it in your hand, refill again.
- No brand-specific procedure exists: Blink publishes no repair documentation we could find, which is itself useful to know: there is no special method, only the standard one.
4. Maven Torch Lighters
- Treat it as a generic fault: Questions cluster around the Alpha model, but the cause is nearly always fuel or a blocked jet. Bleed, refill with quality butane, clean the jet, and only then look at the ignition.
- The "Maven repair manual" is not official: No manufacturer service manual is in circulation, so results under that name are generic third-party documents.
5. Xikar Lighters — Stop Before You Open It
This is the one genuine exception on the page, and it matters more than any repair tip here.
- Opening it voids the warranty: Xikar states plainly: "Do not disassemble your accessory in attempt to repair it yourself, as this will void the warranty coverage." Cleaning the jet by opening the lighter is exactly the tampering that ends your cover.
- You have a limited lifetime warranty: Registration is not required. It covers manufacturing defects but not normal wear and tear, and butane is a consumable that is never covered. Claims are limited to two items at a time.
- Do only these two things: Bleed and refill with quality butane, and blow out the burner head with compressed air. Neither counts as disassembly.
- Then claim, do not repair: If it still fails, file a warranty claim rather than reaching for a screwdriver. See the Xikar warranty terms.
6. Putting a Torch Lighter Back Together
Many people arrive here mid-repair, already looking at a base plate, a jet nozzle and two very small screws. The photograph above shows the usual layout.
- Bleed before you open anything: Never work on a charged lighter.
- Reverse your teardown order: Seat the jet nozzle before the base plate.
- Do not overtighten: The threads are soft and strip easily.
- Be sceptical of online diagrams: Most budget torches ship without any official manual, and internal layout genuinely varies between models. Trust the parts in front of you over a diagram found elsewhere.
Torch Lighter Questions We Get Asked All the Time
A few questions come up again and again from readers, so here are the short answers in one place. If your lighter is playing up right now, start here.
How can I get my torch lighter to work again?
Nine times out of ten it is one of three things: old fuel, a blocked jet, or air trapped in the tank. Bleed the tank fully, refill with high-quality butane, let it sit for two or three minutes so the gas settles, then try again. That simple sequence fixes most lighters before you need to touch anything else.
Why do some torch lighters stop working?
Usually cheap butane. Lower-grade fuel leaves behind residue that slowly clogs the jet and the valve. Add everyday dust, a bit of pocket lint and the occasional knock, and even a good lighter will start to sputter. The good news is that almost all of it is reversible with a clean and a proper refill.
How can I fix a butane torch lighter?
Work through it in order: bleed the tank, refill with quality butane, let it rest, clean the jet with a short burst of compressed air, then reset the flame dial to the middle. Only if all of that fails is it worth looking at the ignition itself. Rushing straight to the spark is the most common mistake.
How do you fix the igniter on a torch lighter?
First check you are actually getting a spark — press the trigger somewhere dim and look closely. If there is a spark but no flame, the problem is fuel or a blocked jet, not the igniter. If there is no spark at all, clean around the electrode with a cotton bud and a little isopropyl alcohol, let it dry completely, and try again. Damp is a surprisingly common culprit.
How do you fix a butane lighter that will not spark?
Let it dry out somewhere warm for a few hours first, since moisture around the electrode stops the spark cold. Then clean the ignition area gently and make sure nothing is blocking the electrode. If it still refuses after a full clean and dry, the piezo unit itself has likely failed, and on most lighters that is the point where a replacement makes more sense than a repair.
Why won't my torch lighter work after I refill it?
Nine times out of ten the tank is airlocked rather than empty. Butane pushed in on top of trapped air leaves no room for fuel. Bleed the tank fully by pressing the valve with a small screwdriver until the hissing stops, let it sit for two minutes to come back to room temperature, then refill in one slow press.
Why won't my torch lighter stay lit?
A flame that catches then dies within a second or two is nearly always a cold tank or a low fuel level. Butane loses pressure when it is cold, so a lighter left in a car overnight will light and quit. Warm it in your hand for a minute. If it keeps happening on a full, warm tank, the fuel valve is not holding open and the jet needs cleaning.
Why is my flame weak, yellow or soft instead of a blue jet?
A torch lighter burns blue because it mixes air with the butane. A yellow, lazy flame means that air intake is blocked, normally by lint or pocket dust in the burner head. Blow it clear with compressed air. A weak but still blue flame usually just means the fuel dial has drifted down or the tank is running low.
How do I clean a clogged butane nozzle?
Bleed the tank empty first, because you should never work on a charged lighter. Blow compressed air through the burner head, then work a single stiff bristle gently into the jet opening. Avoid pins and wire, which widen the orifice permanently and ruin the flame for good. Refill and test it outdoors.
Once your lighter is behaving itself again, it deserves something worth lighting. Have a browse through our Cuban cigars and New World cigars, or see what scored well in our cigar reviews.
Watch It Done: Fixing a Torch Lighter That Will Not Light
Sometimes it is far easier to watch someone do it than to read the steps. This short walkthrough covers the bleed-and-refill routine and the low-flame fix, which between them sort out the majority of stubborn torch lighters.
Once it is lighting cleanly again, give it a minute before you spark it a second time — freshly refilled butane needs a moment to settle.